It is assumed that the state of the image is the same as it was at the end of Chapter 4. If you are restarting the tutorial, you will need to file in the CalculatorInterface class, begin with an image saved at the end of Chapter 4, or reconstruct the image. (It is not necessary to include the calculator application from file calc.st that was used in Chapter 2.)
There are two components to an application with a GUI in Smalltalk: the
application model (the GUI) and the domain model (the underlying
implementation that models the problem to be solved). To complete the money calculator
application, we 1) implement a domain model for a money calculator, and 2)
connect the domain model to the interface model (the GUI/application model).
Open the System Browser
We have defined our class Calculator with instance variables "operand1" and
"operand2", whose values
represent the values of the two operands used by the calculator. We now
complete the implementation of this class in the usual way. To provide the
desired functionality, we will implement methods
Replace the entire method template in the Code View with:
Choose accept from the Code View [Operate] menu. Add the following messages (methods) and choose accept from the Code View [Operate] menu after adding each.
Add the following messages (methods) under the actions protocol in the Code View and choose accept from the Code View [Operate] menu after entering each.
This completes the implementation of the Calculator class.
Note that we would
normally test this class in a workspace before proceeding with the remainder
of the implementation. It is left as an exercise for the reader to create an
instance of the calculator class and to test the methods that have been defined
for the class.
Select CalculatorInterface from the Class View and get the class definition in
the Code View. (In order to display the class definition, you will probably
have to toggle the category away from, and
then back to, UIApplications-New, or alternatively click on the class button
and then the instance button, or select definition from the
Class View [Operate] menu.) Add an instance variable "calculator" in the class
definition as depicted in Figure 5.4, and choose accept from the Code
View [Operate] menu.
Make sure that the instance switch is on in the Class View and select add... from the Protocol View [Operate] menu. A dialog box will appear, enter "initialize" and click OK. Modify the method template to match the Code View in Figure 5.5. Choose accept from the Code View [Operate] menu. The System Browser should appear as in Figure 5.5.
To understand what has happened here, recall that the CalculatorInterface
class is a subclass of ApplicationModel (see Figure 5.4).
The predefined instance creation method (new) for class ApplicationModel
creates a new instance of the class and then
sends the message "initialize" to the new instance. We have defined the method
"initialize" so that it creates an instance of Calculator and assigns it to the
instance variable "calculator" of the CalculatorInterface (GUI) instance.
Thus when a new instance of our CalculatorInterface is created (e.g., by
selecting Start from the Resource Finder) then the "initialize" message
will create an instance of Calculator and assign it as the value of the instance
variable "calculator" of the interface.
For our money calculator main interface window
, recall that we used three data widgets (Operand1, Operand2, and Result)
and three action buttons (+, -, and Clear). Thus we must associate instance
variables with Operand1, Operand2, and Result, and we must associate methods
with +, -, and Clear (and with the menu bar actions as well).
Open the Resource Finder
Select Edit from the Resource Finder action buttons. The Canvas, Canvas Tool, and Palette for the windowSpec resource (main money calculator window) should now be displayed.
The effect of specifying an aspect property for an input/output field and using
the Define option is to add an instance variable to the interface class
for each aspect value. (Thus, the CalculatorInterface class should now have
additional instance variables value1, value2, and result. You can check this
with a browser.) The value of each instance variable is an instance of class
ValueHolder, and this value is displayed in the input/output field whose
aspect is the name of the instance variable.
Two of the messages to which ValueHolder instances respond are value and value:.
The value message returns the value represented in the ValueHolder as a String,
Integer, etc., according to the properties of the ValueHolder. The value:
message is used to cause the ValueHolder instance to assume a new value (i.e.,
to "assign" a new value to the ValueHolder). The
use of these messages is illustrated in the code for the add, sub, and clear
methods below.
When you specify an action property for an action button and use the Define option, the UIDefiner automatically creates a default method whose name is the value you entered in the Action field using the Properties Tool. When an action button is activated (by selecting it when an application is running), that method is invoked. So you now need to modify the UIDefiner's default methods to provide code that performs add, subtract, and clear actions.
If a System Browser is not open, then open one now. Select the UIApplications-New category, the CalculatorInterface class, and the actions protocol. (If the browser was already open, you may need to deselect the CalculatorInterface class and reselect it to get the actions and aspects protocols.) There should be add, clear, and sub methods in the Method View. Select each of the methods add and sub, and replace its UIDefiner default method with its corresponding code listed below. Remember to choose accept from the Code View [Operate] menu after editing each method.
You have now linked the above code to the + and - action buttons on the money
calculator main interface window. When + is selected, the message "add" will
be sent to the interface window object (CalculatorInterface instance) and when
- is selected, the message "sub" will be sent.
The clear method is dependent on the dialog interface. (Recall that we defined
a Dialog Window that will pop up when the Clear action button is activated,
asking "Do you really want to Clear?".) We first associate the NO and YES
action buttons in the dialog window with the predefined methods "cancel" and
"accept", respectively.
To access the dialog interface, open the Resource Finder
Install the Canvas for the dialog interface on the CalculatorInterface class and dialogSpec selector as was done at the end of Chapter 4. Close the Properties Tool and the Canvas/Canvas Tool/Palette.
To complete the clear method for the Clear action button,
from the System Browser select the CalculatorInterface class, the actions protocol, and the clear method. Replace the UIDefiner default method with the code below. Choose accept from the Code View [Operate] menu.
(This method uses the predefined method "openDialogInterface:" to open the
dialogSpec dialog window and return its result. The predefined methods "cancel"
and "accept", used as actions for NO and YES, return false and true,
respectively.)
From a Resource Finder, select the CalculatorInterface class and the menuBar
resource. Select Edit, and the Menu Editor will appear. Change the
text in the Menu Editor text window as shown in Figure 5.7 to associate the
appropriate actions with the menu selections.
(Note: closeRequest is a predefined close action for windows.) Click on
Build, then Install to complete the menu bar installation.
Close the Menu Editor.
The money calculator is now complete. To save your work, save your image or file out the CalculatorInterface class.
There are many reasons for separating the application and domain models,
some of which are obscured by the very simplistic nature of the money
calculator example. (This is a common problem when using a simple
example to illustrate concepts that are most valuable (or not beneficial
except) when applied
to complex problems.) These reasons are fairly standard for good
object-oriented design and good software engineering practice, and an
extensive discussion is beyond the scope of this tutorial. However, some
of the reasons are:
Class Definition for the Domain Model
We begin by implementing a Calculator class. An instance of the Calculator
class will provide the operations needed for our money calculator.  . Recall that the four areas across the top of the System Browser are the Category View, the Class View, the Protocol View, and the Method View, and the lower part of the System Browser is the Code View. Scroll down through the categories and select the UIApplications-New category. A template for a class should be displayed in the Code View as depicted in Figure 5.1.
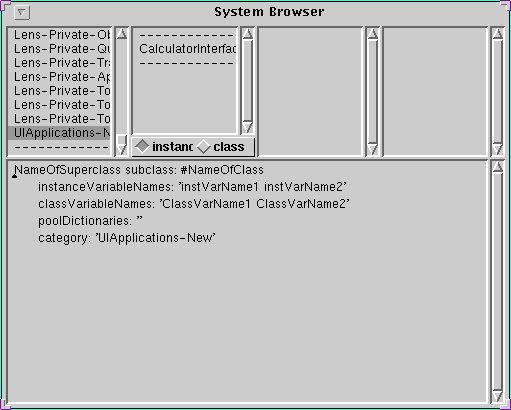
Figure 5.1
Choose accept from the Code View [Operate] menu. The System Browser should look like Figure 5.2. 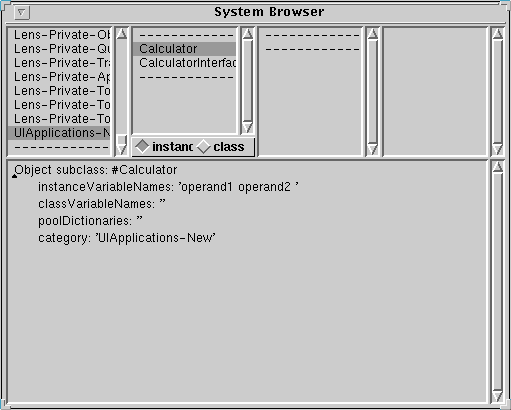
Figure 5.2
Class Comment
VisualWorks has a built-in class comment option. Select comment from the Class View [Operate] menu, replace the template in the Code View with a comment for the Calculator class (explaining what the class represents), and choose accept from the Code View [Operate] menu. Note that there are no restrictions on the format of the comment. Select definition from the Class View [Operate] menu to return to the Class Definition. Class Protocols and Methods
Accessing Protocols
Make sure the instance switch is on in the Class View and select add... from the Protocol View [Operate] menu. A dialog box will appear. Enter "accessing" and click OK. A message template will appear in the Code View as depicted in Figure 5.3. 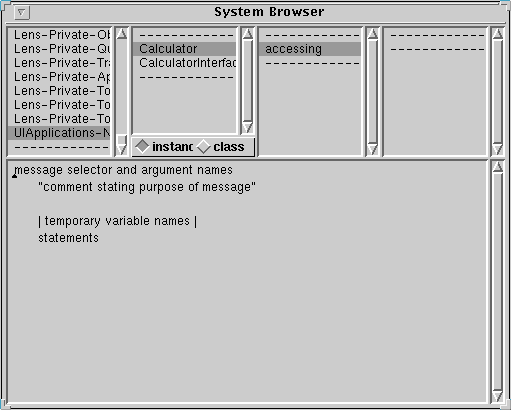
Figure 5.3
operand1
	^operand1
operand2
	^operand2
operand1: aValue
	operand1 := aValue
operand2: aValue
	operand2 := aValue
Action Protocols
Create another protocol by choosing add... from the Protocol View [Operate] menu. Enter "actions" in the dialog box and click OK.
add
	^(operand1 + operand2)
sub
	^(operand1 - operand2)
Linking Smalltalk Code to Interface Components
A calculator window (canvas) is an instance of the CalculatorInterface
(application model) class. We associate an instance of our Calculator (domain
model) class with each money calculator GUI by having an instance of Calculator
as the value of an instance variable in CalculatorInterface. So we now modify
the CalculatorInterface class to contain an instance variable for a Calculator.
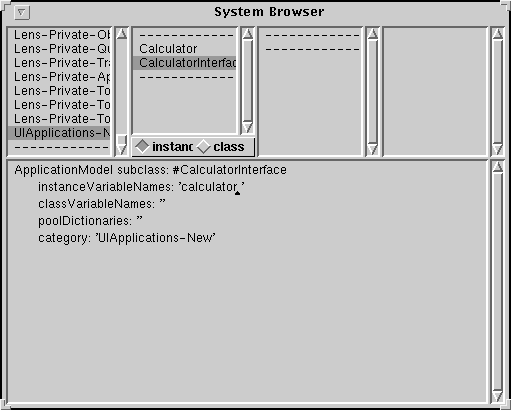
Figure 5.4
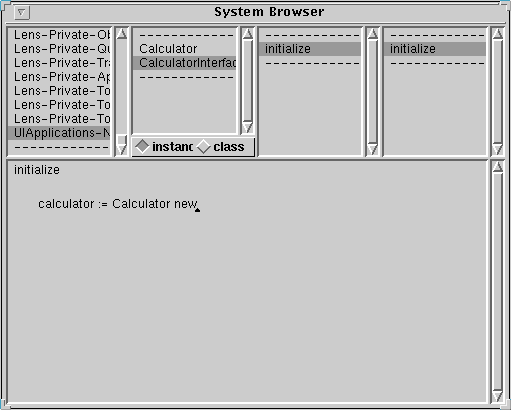
Figure 5.5
Aspect and Action Properties
To link code to data and action widgets, aspect and action properties are used. The aspect property defines an instance variable whose value is associated with a data widget. The action property defines an instance method that is invoked when the widget is selected. Aspect and action properties are defined using the Properties Tool.  . Select View->User Classes from the Resource Finder Menu. Select the CalculatorInterface class and windowSpec resource on the Resource Finder, as shown in Figure 5.6.
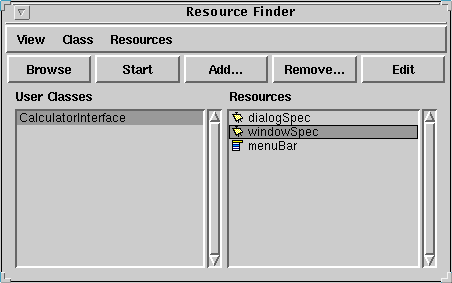
Figure 5.6
Aspect Property
For the operand 1 field do the following:
Repeat for the other two input fields, using "value2" and "result" as the respective Aspect field values. Action Property
For the + action button do the following:
Repeat for the other two action buttons using "sub", and "clear" as the respective Action field values. Install, and close the Properties Tool and the Canvas/Canvas Tool/Palette.
add
	calculator operand1: value1 value.
	calculator operand2: value2 value.
	result value: calculator add
sub
	calculator operand1: value1 value.
	calculator operand2: value2 value.
	result value: calculator sub
 . Select View->User Classes from the menu. Select the CalculatorInterface class in the Class View and then select the dialogSpec from the Resource View. Select Edit from the Resource Finder. The Canvas Tool will appear with the dialog interface on the Canvas. Open the Properties Tool from the Canvas Tool. Select the NO action button, edit the Action field on the Properties Tool, enter "cancel", and click Apply. Select the YES action button, edit the Action field on the Properties Tool, enter "accept", and click Apply.
clear
	|accepted|
	accepted := self openDialogInterface: #dialogSpec.
	accepted
		ifTrue: [ value1 value: 0.
			value2 value: 0.
			result value: 0]
Completing the Menu Bar
Our final step is to complete the menu bar. We need to associate actions with
each of the menu options. 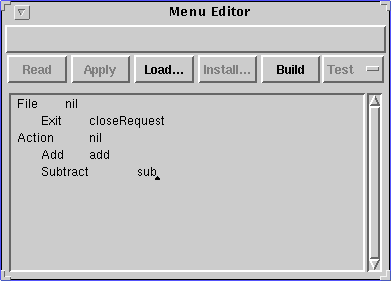
Figure 5.7
Testing the Application
To test the application open a Resource Finder and select View->User Classes from the menu. Now select the CalculatorInterface Class and the windowSpec Resource. Select Start from the Resource Finder. You now have a running application. Experiment with the money calculator to convince yourself that it works. When you are finished, select File->Exit from the Money Calculator menu and close the Resource Finder.Final Notes
It may be usedful to note here that the money calculator application could
easily have been done without using a domain model (i.e., the Calculator
class), and doing so would possibly have been easier and simpler. We could
have provided the functionality needed for the + and - actions directly in
the add and sub actions without using the Calculator instance at all.


